Configure Plugin
How to add Gratify Pay BNPL as a payment method in WooCommerce
Overview
In this section, we'll walk through the steps required to configure Gratify BNPL on your WooCommerce store. You'll learn how to:
- Access GratifyPay Settings;
- Configure your Merchant Keys;
- Configure Gratify BNPL Messaging; and,
- Configure all other options;
Estimated time: 5-10 minutes
Configuration
- Settings
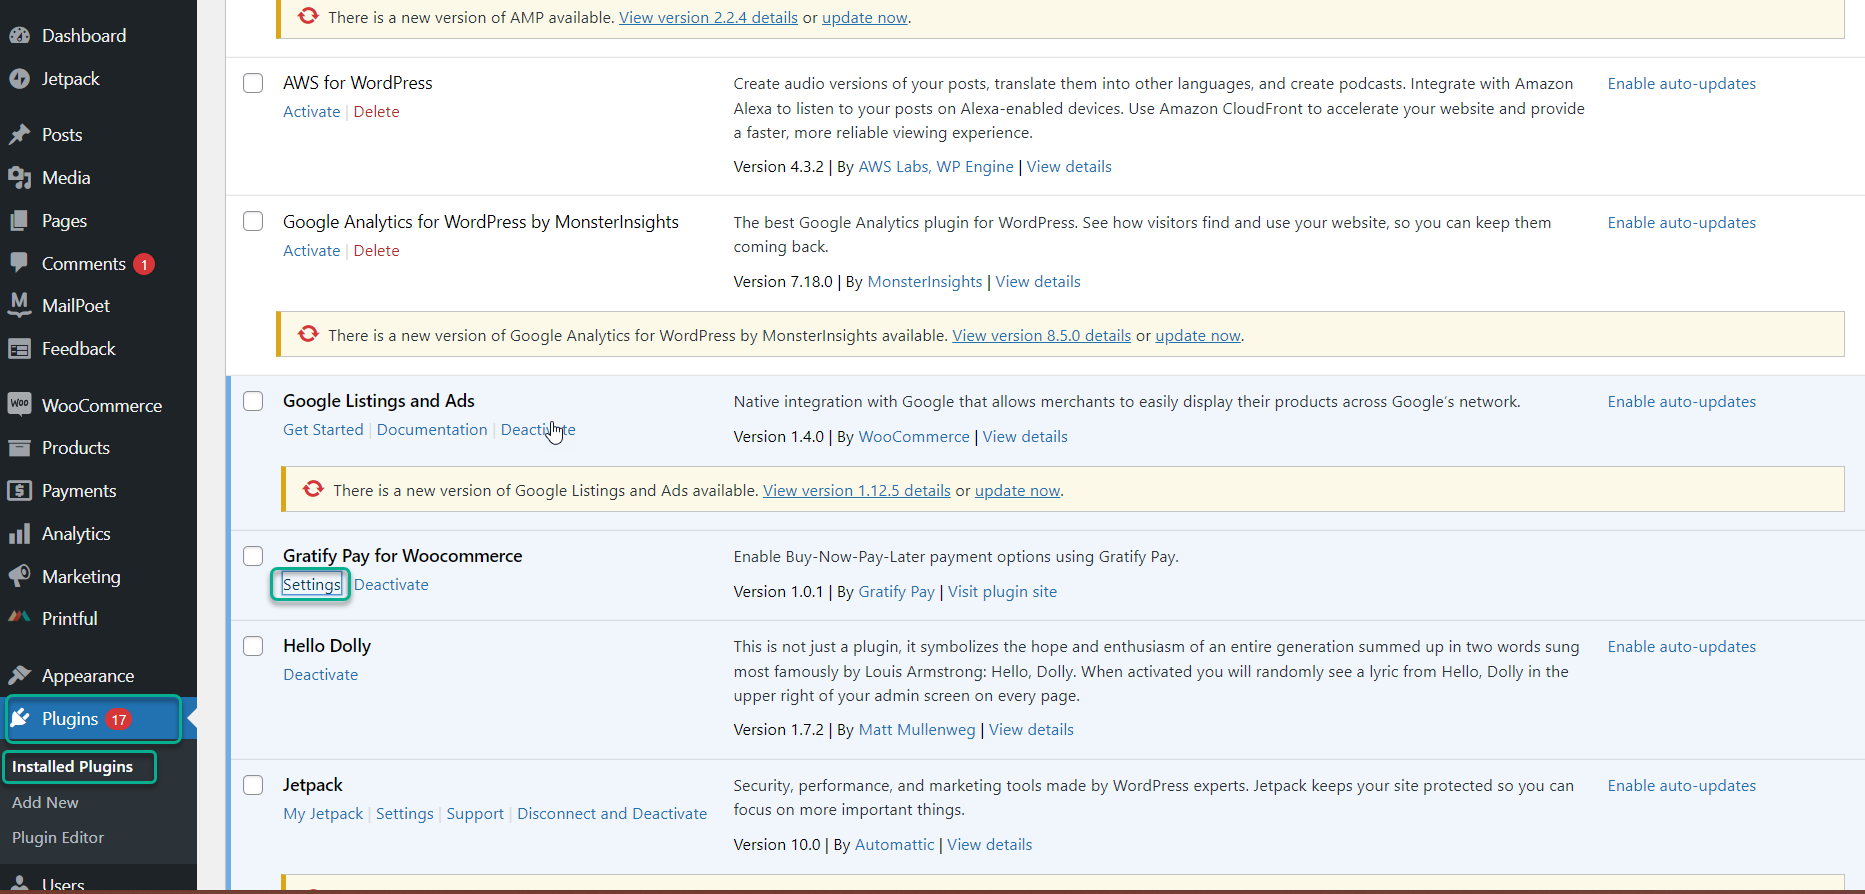
Click on Plugins → Installed Plugins, then navigate to "Gratify Pay for WooCommerce", and click on Settings.

- Keys
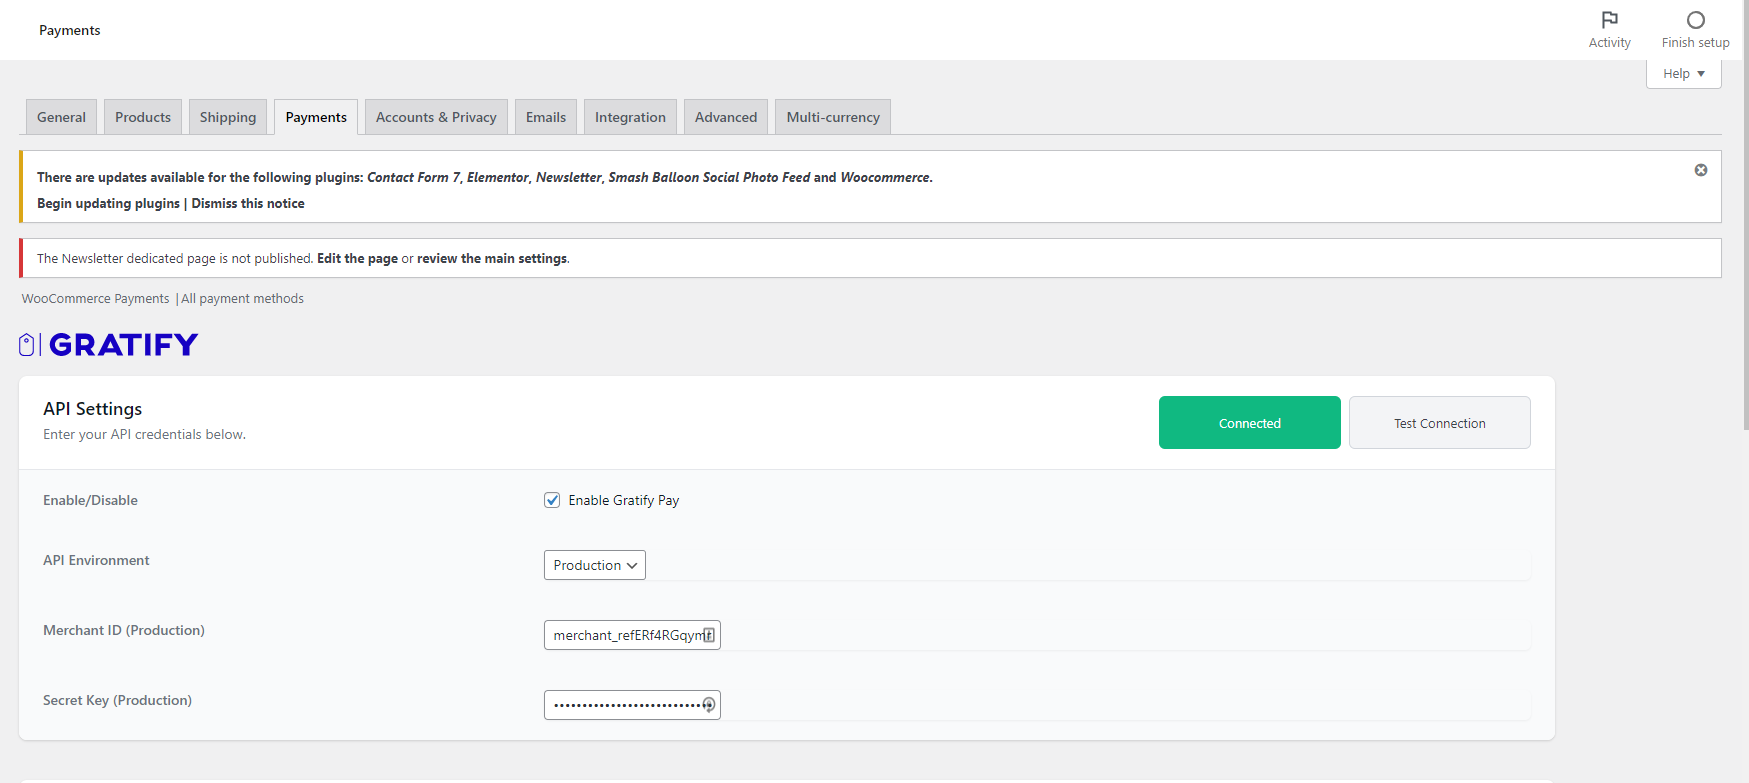
Input your Merchant ID and Secret Key.

- Configure the Gratify Pay Messaging Placements
-
Enter a Title for for Gratify Pay BNPL that will appear in the list of payment options
-
Select a Theme
Theme Example Blue 
Charcoal 
White 
-
Choose whether to enable the Gratify Pay payment information on Category Pages.
-
Choose whether to enable the Gratify Pay payment information on Individual Product Pages.
-
Choose whether to enable the Gratify Pay payment information on Product Variants.
-
Payment information is not optional on the Cart Page.
NoteClicking Edit on any of the payment information options will allow you to customize the look and feel of the information displayed. See Customize Look and Feel for more information.
- Everything Else
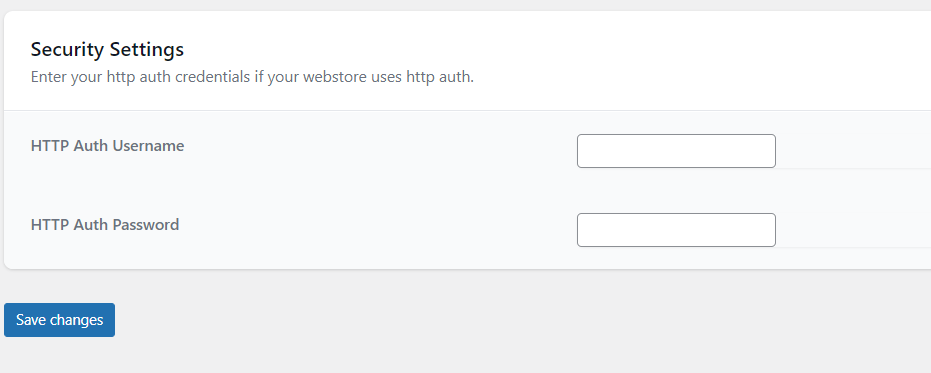
If your web store uses HTTP authentication, you can enter the credentials here to enable Gratify Pay callbacks on completed purchases

Review
In this section, we saw the steps required to configure Gratify BNPL on your WooCommerce store. You should now have:
- Configured your Merchant Keys;
- Configured Gratify BNPL Messaging; and,
- Configured all other options;
Updated 5 months ago